SF Cheese School

A few weeks ago, my friend Meredith and I went to cheese 101 at The Cheese School in SF. She was planning to go with her husband, Andrew, but he went to London on a last minute work trip, so I was lucky enough to tag along. :)
The school is located in between North Beach and the Wharf in SF. The space itself is super cute and welcoming -- it felt more like a dinner party at a friend's house than a class. They served us red and white wine, bread, and apples for pairing and slowly walked us through each type of cheese (it was sort of agonizing to wait to try each one, but well worth it in the end!).
The class was all about learning the basics of cheese: how it's made, how it's classified, and what to pair with each type. My personal favorites are the alpine cheeses, but I really do love them all. 
The class lasted about 2 hours in total. Being the cheese lover that I am, I had so much fun and will definitely go back. It was a super fun experience to go with a girlfriend, but it would also make an amazing date night. Thanks for taking me, Mer! xoxo

New Bike!

I just bought my first nice bike and feel like an official city girl now. I chose a PUBLIC bike and I love it so far. This weekend, we took an inaugural bike ride to the Ferry Building and to Fort Mason. Besides being totally paranoid that someone is going to steal my basket, so far so good. :) 

Wedding Shower


Our friends Meredith and Kristina held the sweetest wedding shower for us this weekend. Hooray for having lovely friends! It seems like just yesterday that the roles were reversed and I was co-hosting Meredith's shower, and now she's all married. :)
The day was so much fun. Kristina made all of the decorations (she's the best DIY'er) and my friend Haley designed the little state print of California, North Carolina, and Georgia intertwined.
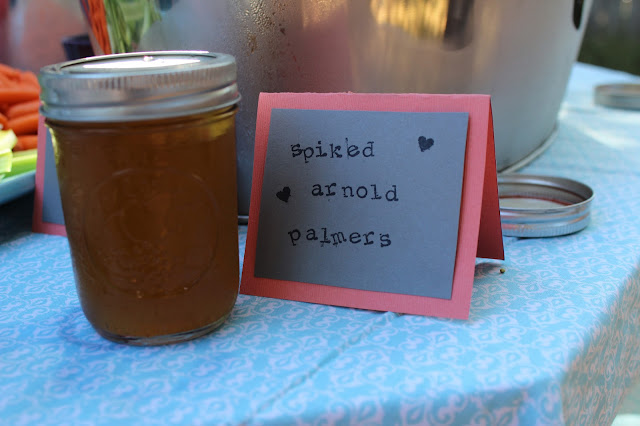
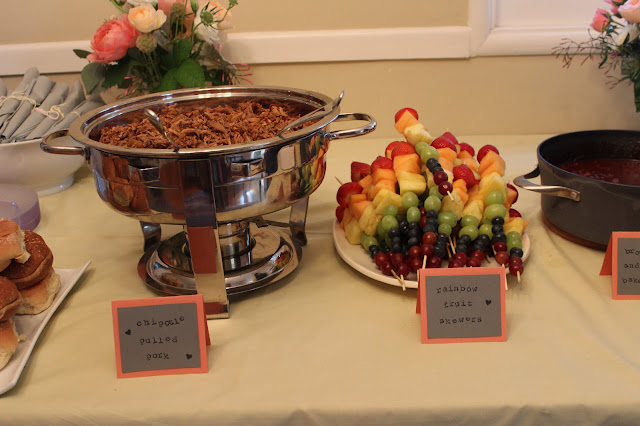
Meredith cooked up the most amazing spread of food. We snacked on homemade caramelized onion dip and then she served delicious comfort food for dinner: pulled pork, mac-n-cheese, fruit skewers, baked beans, and homemade ice cream sandwiches. Of course, I ate two ice cream sandwiches (she made two types, so it would be rude not to try them both, right?). She even whipped up individual cocktails in tiny mason jars - spiked Arnold Palmers, which were amazing.
Thank you so much for hosting, Kristina & Meredith. We were blown away by the adorable shower and loved being with such wonderful friends. xoxo

Bread & Butter Jalapeño Pickles Recipe

I'm in Georgia for the July 4th holidays and my mom and I have been taking advantage of the local produce and doing some pickling. First up, bread and butter pickles -- we went off of a few recipes and here is the recipe we came up with:

Ingredients:
- Approximately 4 pounds of pickling cucumbers, sliced
- 5 small onions, separated into rings and then thinly sliced
- 5 jalapeño peppers, sliced and seeded
- 1/2 cup of canning salt (you can substitute with kosher salt, but canning salt works best)
- 5 cups of sugar
- 2 cups of white vinegar
- 2 cups of apple cider vinegar
- 2 tablespoons of mustard seed
- 2 teaspoons of celery seed
- 1.5 teaspoons of ground turmeric
- 1/2 teaspoon ground cloves
- 1/2 teaspoon red pepper flakes for a bit of spice :)

What To Do:
- The first step is to cut all of your produce. Slice both ends off of your cukes and then slice them into 1/2 inch pieces. We used this handy tool to make them crinkle cut, but a regular ol' knife works just fine. Slice your onions into rings and then thinly slice them into pieces. For your jalapeños seed them and slice them into thin pieces. Make sure you wear gloves for this step to protect your skin!
- Thoroughly mix the cukes, onions, and jalapeños with the canning salt, lay a cheese cloth or tea towel over your mixture, and spread a few cups of crushed ice on top of the cloth. Put your bowl into a fridge for 3 hours.
- After 3 hours of chilling, rinse the produce, drain, and rinse again.
- Next, we'll want to create a brine. Mix together the vinegars, spices, and sugar. Bring the brine to a boil and then add the produce mixture. Bring the mixture to a boil and then remove from the heat.
- After sterilizing your jars, tightly pack each jar and fill with brine (stop 1/2 inch from the rim of the jar).
- Place a sterilized lid on each jar and seal it using a canner. We use a steam canner, which I find MUCH easier to use than a water bath canner.
- Let each jar process for approximately 10 minutes in the canner, then remove carefully and let cool. Each seal should pop down! If they don't for some reason, stick your pickles in the fridge and consume within a few weeks. :)

Happy summer and happy canning!